Any fans out there? If yes, I think you are really gonna get a kick out of this cake! (Hint: It’s for ANY lever baker!)
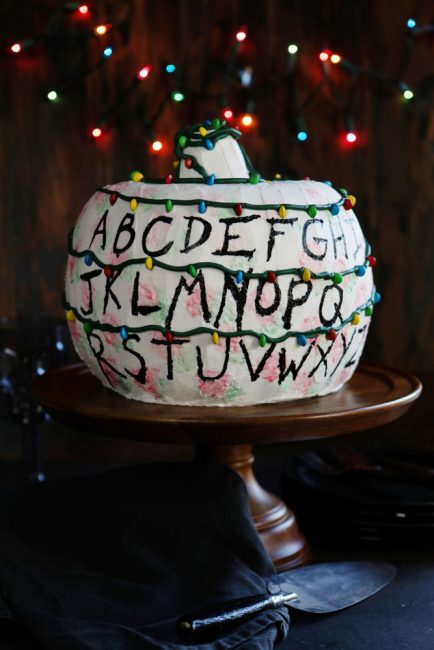
When I heard season 2 of that scary show was coming out I knew I had to make a cake for it! (Just in case you want to see the trailer, it’s right here) But, because it premieres on Oct. 27th, I decided to add some Halloween flair! It was also really important to me to use tools and supplies that every baker can easily access. The cake is box mix (you can absolutely use your favorite homemade recipe), the outside is buttercream, and all of the painting and lettering is McCormick food color! With a few mini M&M’s for the scary lights.
Let me break it down:
there is a pumpkin shape for the Halloween release
white and black cake with red buttercream to mimic The Upside Down
the floral wallpaper and alphabet letters with Chrismas lights for how Will communicated with his mom
a wood cakestand for the bottom half of the wall
There, I think I got all the references in there! (I originally saw this design on a pumpkin and thought it would be neat as a surprise inside cake!)
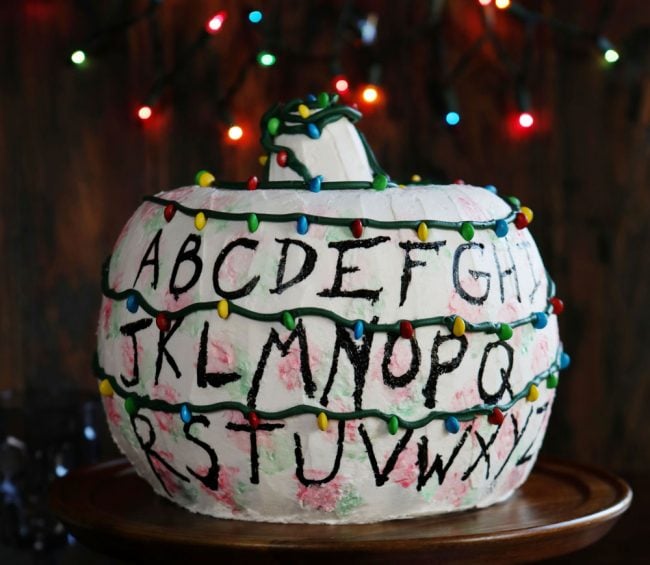
To make this cake you will need:
bundt pan
2 boxes white cake mix (or you can double this white cake recipe)
2 boxes chocolate cake mix (or you can double this chocolate cake recipe)
buttercream recipe (doubled)
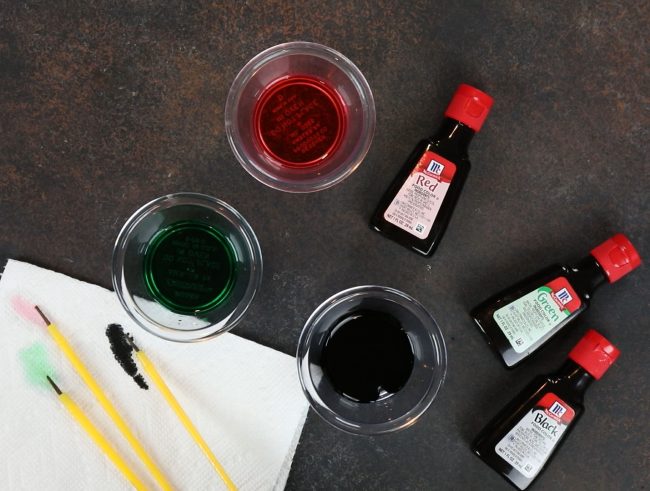
red, green, black McCormick food color
3 small bowls
paper towel
small paint brushes (I bought a few kids’ watercolor sets and grabbed the brushes from there)
ice cream cone
decorating tip #5 (small open round tip)
pastry bags
mini M&M’s
small offset spatula
wood (or faux wood) cake stand
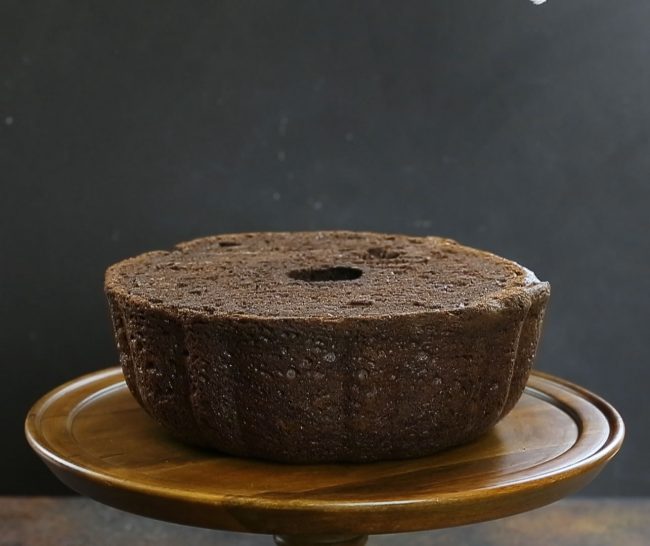
Begin by preparing your bundt cakes. I used 2 boxes of white in one bundt pan. When you bake it, the cake will rise above the pan and this is exactly what you want. After the cake has cooled, use a long serrated knife to level the cake while still in the pan and using the pan as your guide.
Invert cake onto a cooling rack and place in the fridge to cool for at least 1 hour.
Repeat with the chocolate cake.
While cakes are cooling, prepare buttercream. I used this recipe and doubled it. I did have some white buttercream left over, but I am a firm believer that having too much is better than having too little! Separate one cup of the prepared buttercream in a bowl and tint it red using McCormick red food color. Separate another cup into another bowl and tint green. From there I placed my red and green frosting into pastry bags to store until ready to use.
Place the cooled chocolate bundt cake on your cake stand making sure to have the cut side facing up. Place a ring of white buttercream around the outside edge. Now fill in with your red buttercream.
Place white bundt cake on top of the chocolate cake. You should now have the shape of a pumpkin!
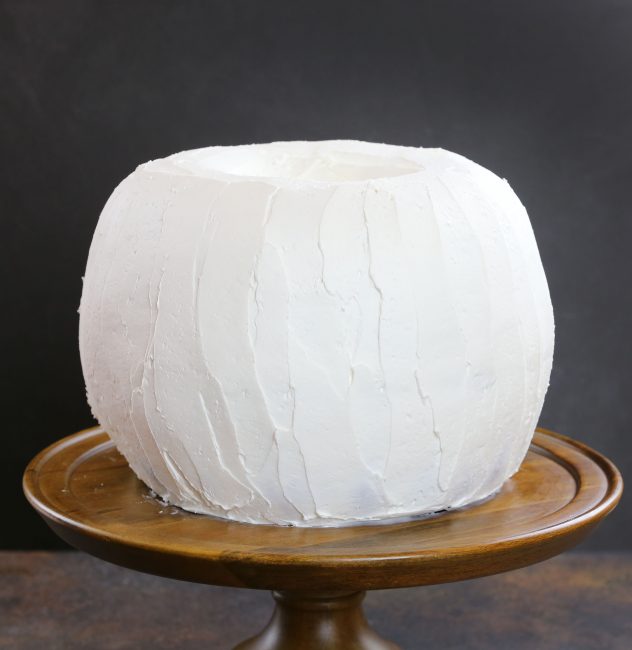
Cover the outside with white buttercream and smooth out with an offset spatula. I went for a “rustic” finish on my cake as I knew I would be painting all over it. (If you happen to have fancy cake decorating tools you can easily achieve incredibly details and smooth buttercream.)
Pipe some white buttercream on the top edge of an ice cream cone and nestle it into the top of the cake. Cover with more buttercream and smooth out with offset spatula.
Place cake in the fridge for about an hour to set. (I did not do this when I made the video of this cake, and while it still worked, I prefer to paint on a very chilled cake.)
Prepare your paint! Get out your small bowls. In the first bowl add 1 tablespoon water. To that add about 1-3 drops of red food color. Start with just a couple drops and see if that is deep enough. In the second bowl add 1 tablespoon of water and to that add 1-3 drops of green food color. In the last bowl add the black food color. You should only need about 1/2 teaspoon.
To make the floral wallpaper, simple dab your brush into the pink and press onto the buttercream. Make a rough circle. I started on top and really got a feel for painting, then moved to the sides. I would repeat the pink flower over the entire cake and then move on to green. I had a paintbrush in one hand and a paper towel in the other. When (if) the watercolor started to drip I would very GENTLY dab with my paper towel and soak up the extra liquid.
For the green, I simply did the same dabbing technique, but only on one side of the flower. (Bottom right for instance.)
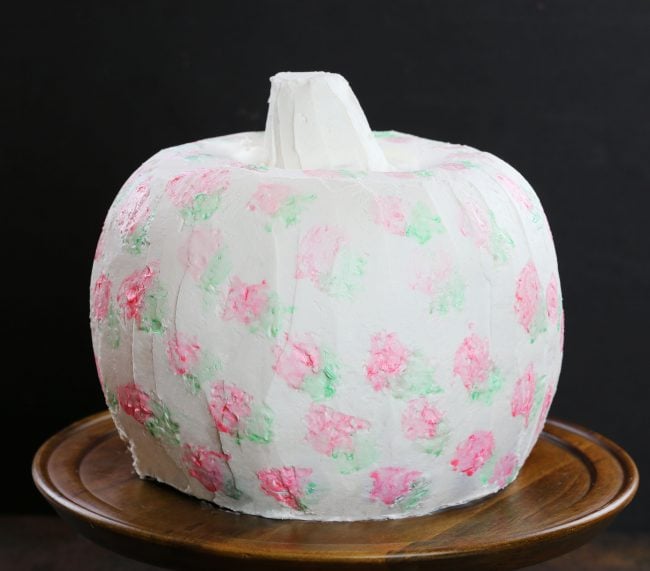
Once the cake is covered in flowers, chill for about 15 minutes.
For the letters on the cake, I pulled up a picture of the Stranger Things wall on google and just tried to replicate the font.
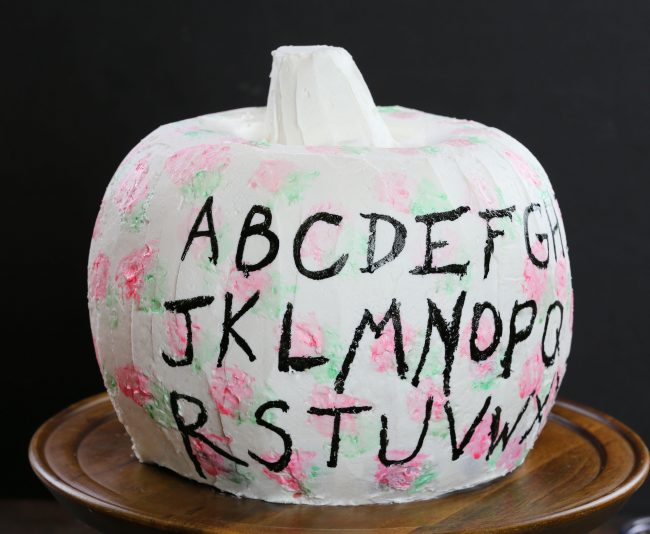
The great thing about replicating it is, dripping is good and you do not need good handwriting (or cake decorating skill) to replicate it! I did A-I on the top row, J-Q on the second row, and R-Z on the bottom row.
The next step is to get your green buttercream in a pastry bag fitted with a #5 small open round tip. This is how the Christmas tree lights cord will go on the cake. Start at the top and work your way down the cake making sure to put the line above each row of letters.
Lastly, add a mini M&M over each letter. I tried to keep them in a repetitive pattern (red, yellow, blue, green) on each line, but I think even doing it randomly would work.

Final step? Cutting into your cake!
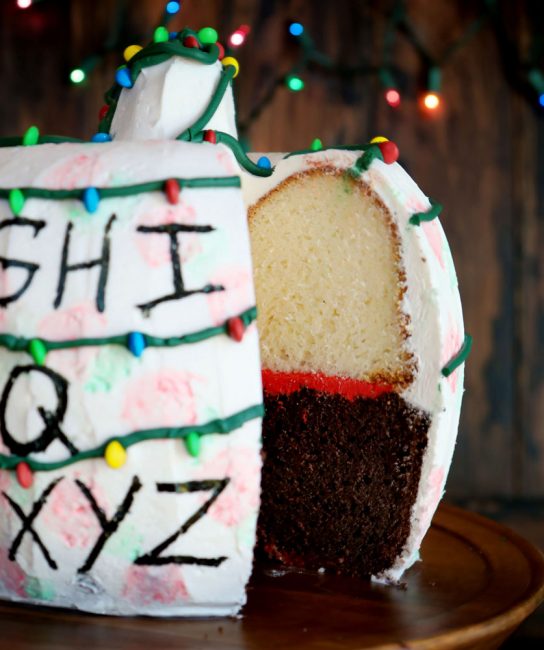
Not only is this cake perfect for any fan, but it tastes amazing too! White cake, chocolate cake, buttercream, and M&M’s! I know my kids LOVED it!
Here is a little video on how I made this cake:
As always, a big thank you to the brands that support me here at iambaker. McCormick is an amazing company with amazing products and I am thrilled to be a partner!


My son will definitely going to love this cake, thanks for sharing this 🙂
Being older,…..the print on your lovely website, is very faint and probably too small making it difficult to read. I love the pictures. Thank you